Monday 30 June 2014

Beige Neutral Summer Chic Look Book OOTD ❤


❤ LOOK BOOK LINK: ❤


June Favourites 2014 ❤


Hi friends, Its that time of the month where I will be showing and sharing products that has been treating me like a princess during that duration. Although, I want to splurge on you all the products that I am loving at the moment, it will definitely be a longer video. However, to keep it short; I will show you my top 10 random favourites of products then hopefully, I will be catching up with the schedule and notifying you what I am using the most and what not. No rush.


This month's favourites, June. Is a mixture between products that is favourable to use in the summer as well as those days where you just want to look pretty and awake. The top 10 products I have been loving this month are:

 Other Products not Mentioned:Shirt: New LookNails: Essie - Bikini So TeenyLips: MUA deluxe gloss - Purple 

So yeah, those are basically the products that I have been loving. Sorry, If the camera is not focusing right and I kept on stuttering throughout this video; its quite nerve wrecking and weird talking in the camera. But don't worry guys, I will get used to it. haha. 

Have a great day/night  guys! heart.Sette Ventura. 

Wednesday 25 June 2014

Pink Summer Tutorial using Drugstore Products ❤

Hello friends, I decided to create a festival friendly look with the makeup, hair and clothing wear. It is fairly easy and affordable. I absolutely love making this video as well as creating this look. It is super fun yet girly at the same time. It suits any occasions really from casual days, chilling with friends and going to events like festivals. It is definitely perfect for this UK weather! I have a separate blogpost and Lookbook link to know more about my outfit on this video and blogpost.

❤ OOTD Festival Friendly Look: (Follow me in LookBook) :)
http://setteventura.blogspot.co.uk/2014/06/summer-festival-fashion-look-ootd.html
http://lookbook.nu/user/3529106-Sette-V/looks

What I haven't included in the video was that I applied some sort of moisturiser with SPF for protection from UV rays as well as a good base for my makeup. Also, I did not apply any drugstore foundation as I do not really need it as much because it will just slip off from your face therefore, concealer was the best option for me because its coverage is not doubtful. haha.
FYI. the hair spray can be quite messy do not spray near your fabric as it will do transfer make sure its arms length and sprayed in an high angled perspective and I know I spelt 'Pallette' wrong haha, my bad. Otherwise, I hope you do all enjoy this tutorial.


Products to achieve this Pink Summer tutorial: 


I used this product on areas where I needed coverage and to lighten up areas that contains different darkening pigmentations. I will also use this on different areas of my face where I will be applying my concealer.
I used this product to set my concealer. 
I applied this on my water line. 
Waterproof is a way to go, if you are going to events that are highly likely to be super hot! 
Add that pop of hot pink on your lips, ladies! 
I added this hair spray onto my hair because it looks pretty! but be careful, it can be quite messy. (Review Soon)

Other Products: 
  • Hair Piece: Primark
  • Contact Lens: Desio Lens :) (Review Soon)

I hope you enjoyed this tutorial :) Have a great day/night friends! 


Monday 23 June 2014

Summer Festival Fashion Look OOTD ❤


Hi friends, I put up a clothing look in which is perfect for that summer fun vibe. It is simple yet inexpensive. All details about this look will be in my LookBook such as where I got such top and shorts from as well as the links where you can buy it. It is definitely a festival to casual day friendly look. 

I love how this top accentuates my collar bones as well as the colour of my hair which is this ashy blonde. The cut out on the back of this top is so beautiful, it is actually one of the reasons why I bought this top. Since the front is so simple but behind is just unbelievably breathtaking. The shorts are one of my staples in my wardrobe, perfect for those sunny days. Another perfect point about this outfit too is that it suits any accessories and shoes you want to wear however, do avoid wearing pointed heels as it drags the look a bit. I suggest flats, high-to-short length boots, wedges or gladiator shoes. 

haha my dog.


#ootd #fashion #festival 


Sunday 22 June 2014

Mint Touch of Summer Eye Makeup Tutorial ❤


As mentioned in the previous post, I do not want to fail in uploading this eye makeup look as well as an expanded list of directions on how I used the products to achieve such beautiful yet simple eye makeup look. It is certainly wearable and attractive to wear for this season. Also, it is perfect with people who have darker eyes like me.

If you haven't seen my face makeup routine yet, I suggest you watch that first If you want to know more about what I used and how I used such product to gain a flawless canvas.
http://setteventura.blogspot.co.uk/2014/06/flawless-face-make-up.html (Blog Post)
http://youtu.be/wA2ZweJUuI0   (Youtube Video)

As a note, before I mention all the things relating with this eye make-up look, you will notice from my previous video that I applied the Max Factor CC Corrector on my lids to act as my base because I do have oily eye lids.


Products used to achieve this mint summer look (haha) :

Eyebrows:

Probably, my preferred technique on how I fill out my brows to make it look fuller and natural. Although, I do use more product than I am supposed to.. It still comes out looking softer however, you need to at least do a little blending with your spooly.

Eyes:
A good trick to make your eyelashes look fuller is by tight lining your upper rim of your eyelids with a dark eyeliner, whether it is black or grey. I chose this eyeliner since I don't really like using too much of a black eyeliner because it gives the effect of smaller looking eyes. And you know, as an asian; it is all about accentuating your eyes. Small eyes < Bigger eyes.
 OMG, this eyeshadow pencil is bombdiginty! While, I was strolling past the makeup section in Superdrug. There newly eyeshadow pencil range that was just recently released caught my attention not just because of how inexpensive they were but because the colours were pretty and very wearable. Anyways, I applied this eyeshadow pencil all over my lid to act as another base but this time, it will help warm up the eyeshadow I will be patting on top of it. Simples.
This grey eyeshadow got a tint of red to it therefore would look great on brows too! However, for this look; I am just patting this eyeshadow on to my lids again. After so, the key here for this makeup look is blending therefore, blend away. We do not want harshness in any of our looks unless you like it that way. 
Although, this is a powder bronzer, It looks astonishing on the crease area of our eyelids. I'm guessing, If you watched the video; you'll see the full effect it gives. Smokey, right?. Don't forget to blend again. 
Ahh! Couldn't have enough of this eyeliner. It is absolutely gorgeous especially on the eyes. Apply this on your water line and let it set for a good 2-3 seconds then after go to the next step ;) 
Yes, I know. We already got an eyeliner on our waterline but what's better than applying another shade of colour? the previous eyeliner was a metallic turquoise colour but I wanted more of a combat/royal blue tint too. So why not? And a good tip for you too, apply this on or add several more coats and you'll find your eyeliner staying on your waterline for hours and hours. I dragged the eyeliner quite high a bit so that it will blend softly with the tight line liner. 
This is one of my favourite black liquid liner in the drugstores. It lasts for hours with a bit of tweaking here and there. Apply this product on to your eyelids near your eyelashes bearing in mind that we will be applying lashes therefore you can apply it a lot thicker if you want or as a starting point to help/guide you whilst applying your lashes.
This was just a random pick up, but I decided why not. Experimenting using this eyeliner product with this eye look. And it still looks fab. I add a dab of this on the centre of my eyelids and blend it a little bit since It does dry up quite quickly. Further into it, I applied a little bit on the bottom lash line, not too extravagant but enough to add a little more shimmer. Beautiful, isn't it? 
I applied this mascara just on the bottom lashes to ensure I do not disturb the magic under that area of the eyes. 
What completes the look? Obviously, lashes! I'm not much of a lashes kind of person but I know what completes a makeup look and it is to add this. I chose quite natural ones, since those big flared out lashes makes my eyes look smaller even though, they are so glam. I'm so jealous of you, If you suit wearing big beautiful fake lashes. 
Before I forgot, I added this highlighter on my inner eyelid to make my eyes pop! This yellow toned highlighter compliments the blue/mint colour in our waterline. It makes it look so tropical. 


-------------------------------------
Other products? 

Lips: MAC Pro Longwear Lip Pencil - Nice 'n' Spicy
MAC Cremesheen lipstick- Ravishing AA2

Top: H&M 

---------------------------------------

Follow me on Blog Lovin': http://www.bloglovin.com/setteventura
Follow me on MakeupAlley: http://www.makeupalley.com/p~settex3
Follow me on Instagram: @Josettex3
Follow me on Tumblr: http://www.itsimperfection.tumblr.com

Business Enquiries: http://setteventura.blogspot.co.uk/p/business-enquiries.html


Friday 20 June 2014

Flawless Face Make-up ❤

Here in this post, I will be showing you how you can transform your face into flawless looking skin in under 10 minutes. Along with that, the directions on how to apply such product, products and video will be below too. Enjoy ! (more pictures below)
----------
Since summer is definitely out now, I just wanted to share to you all how I put on that flawless mask. If you do have super oily skin, I suggest you use a setting powder or a stronger primer to hold your face makeup. A good base primer as well as a base coat holds it all together.


Products Used to achieve this flawless face
Not entirely sure about this primer. It was my first time using it on this video and I did not really know what to feel about it but I will ensure to update you on that in another blog post. :) 
Apply this gorgeous foundation evenly, starting in the centre of your face then blended outwards. What is lovely about this foundation is that it is very buildable and easy to blend. 

Beautiful Brush to use with liquid foundation such as the G.A.L.S. 
I applied this concealer starting from the centre of the face and then focusing it underneath the eyes as I do need to remove those unwanted dark circles.
 

This is directly applied into the lids as a base for my eyeshadow as I do have oily lids.

I used this powder in order to remove the oily/shineness from my forehead and underneath my eyes. I also apply it on areas where I wanted to apply my bronzer and blush. 

Using this bronzer, I take a dab of this with my Eco Brush into the sockets of my face. Make sure when contouring, you do not go past your eyebrow as it will look unnatural and dragged on. Again, I use this product to warm up my face therefore, I apply it on my temples as well as my chin and lower jawline.

Apply the blush on the top of your cheeks or apples. 

Sad to say that this product is limited edition, it is such a great product to use for highlighting. I hope Urban Decay continues to make this product again because I am so in love with it! 


Wednesday 18 June 2014

This weeks favs. ❤


Frid 13th -Weds18th June. 
I wanted to share a couple of products that has been making me survive the start of summer in the UK. My hay fever is quite bad this year compared from before, so i just need something that will make me feel at least a little tad better. These products have definitely gave me that umpf this week and last month. It is my go-to makeup products.

From left to right:
-------------------------------
Macadamia Healing Oil Treatment:
My hair have been looking dull and super dry at the moment as I have been colouring my hair with multiple of products to make it as blonde as it can now. I know that it is a sign of a hair rescue mission using loads of products to revive its natural state again. However, although some of the products I have been using at the moment have been giving me effective results; I started to look at my hair oil/serum collection and this by far have been my favourite. It gives my blonde hair such a radiant touch as well as helping it regain its natural oils.I apply this product by massaging it from the ends of the hair then the remaining residue left on my palms is applied directly on the top of my hair. I make sure that I avoid applying too much oil on the roots as It may look too greasy.

Brows: Sleek MakeUP Brow Kit &+ MAC Brow Set:


I have been loving this combo a lot! Ever since, I have dyed my hair lighter. It was a must for me to lighten my brows too. Therefore, I bleached it using the Jolens product. My eyebrow looks so lighter and it changed my whole outlook but it made my application of using brow products easier. These two products gave me the fullest looking brows that suits my hair colour at the moment. And I am super in love with it!

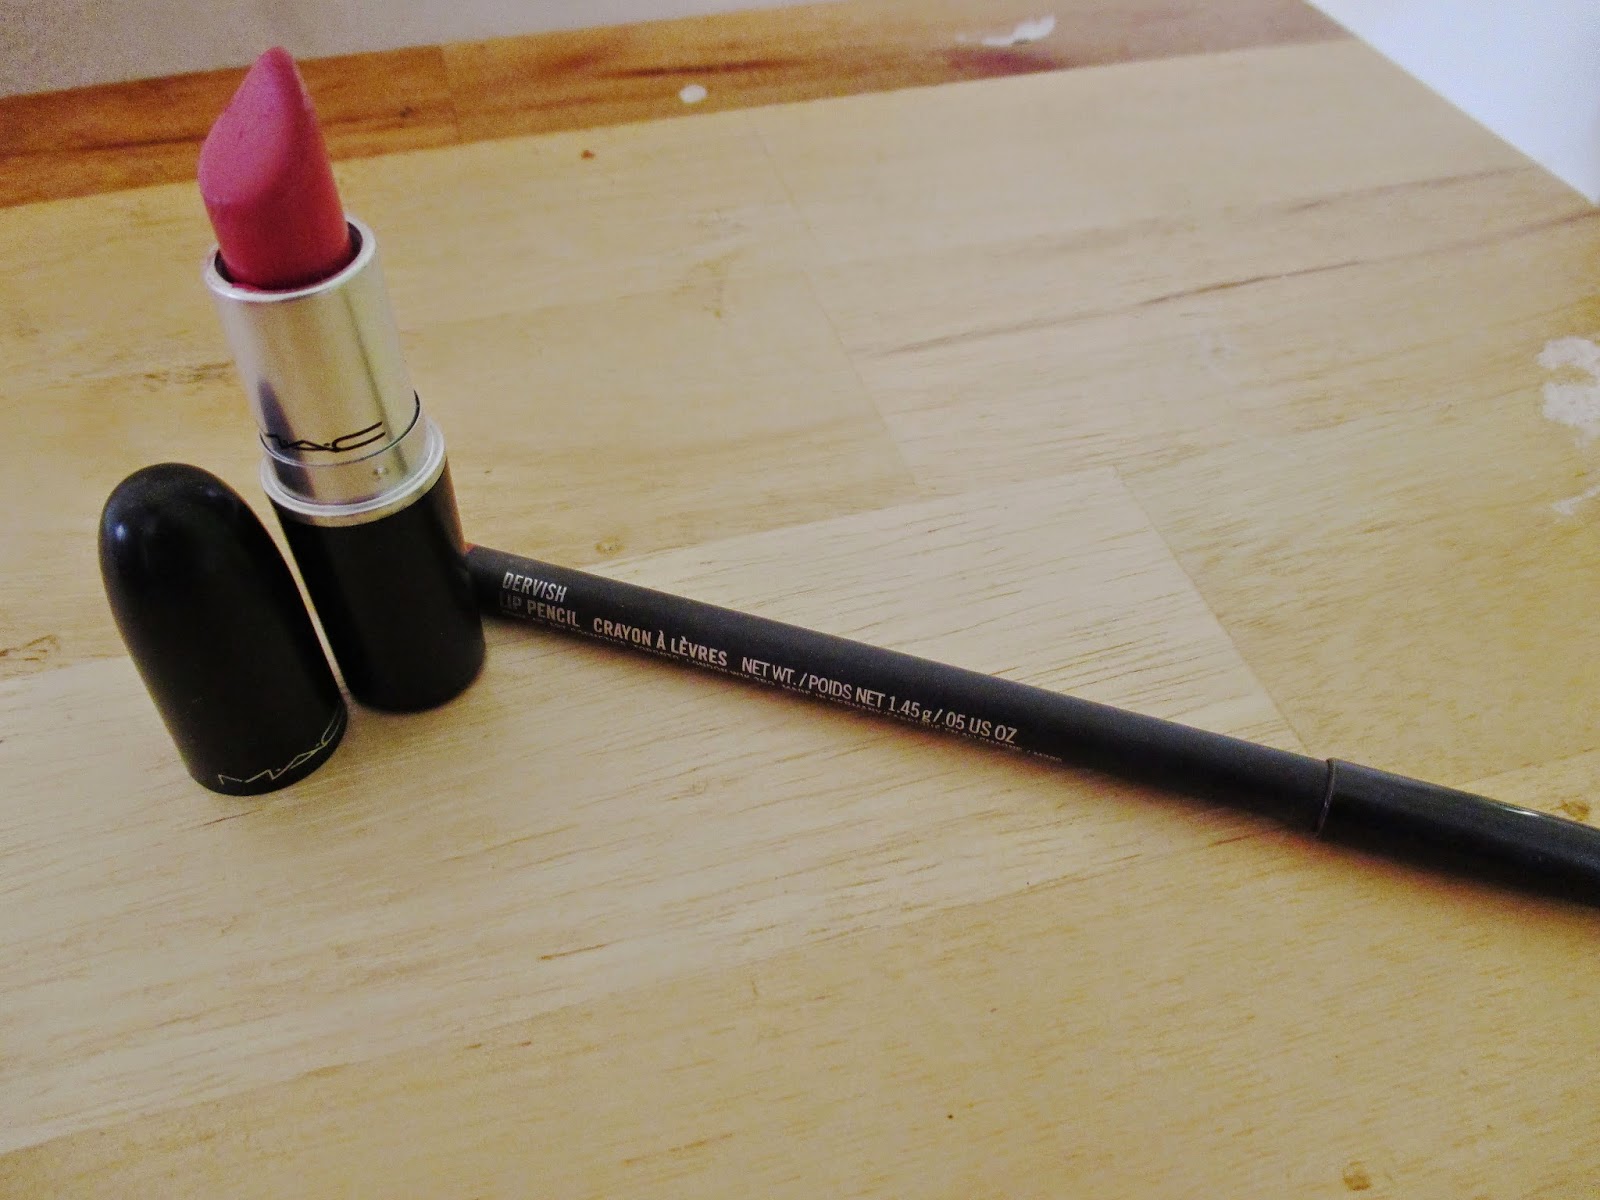
Lips: MAC lip combo. Dervish &+ Matte Please Me:


Looking for a more natural lip combo? This is my go-to favourite lip combo at the moment. Directions on how I use it is below:


Beautiful Colour! Make sure to moisturise your lips first, as a matte lipstick is a no go when it comes to dry dry lips.

Eyes: NARS Eyeliner &+ Charlotte Tilbury Mascara

Need I say more? This eyeliner is amazzzingg! It is almost a dupe of the Rimmel Scandal Eyes in Nude eyeliner. It just makes you so awake and despite me having a terrible hay fever, it makes my eyes look awake and bright. The mascara is gorgeous too when combined using some sort of good quality eyelash curler like Shu Uemura or their own brand eyelash curler.


Simple Spotless Skin Quick Fix Cleansing Wipes:

You could not go wrong with good quality face wipes. I use this to remove my face and eye makeup as well as in days where I just want my face to freshen up. I prefer these more than any other makeup wipes I have tried. Although, the prices kept dodging and changing from time to time. I still love it!


Face: Bobbi Brown Skin Foundation Stick in Warm Neutral:


If you are looking for a natural foundation that have light coverage yet still looks like skin? Want something easy to travel with in your handbag without gaining the extra pound to carry? No worries guys! This product is for you! Although, Bobbi Brown have been focusing more on the people who have a yellow undertone. They have came up with these in a variety of shades which I am sure that you will find your perfect match. The price is quite up there but I am telling you this will make your face look even more flawless and it is also a nice makeup gift for your loved one. The packaging is  simple yet classy. It is a smooth application and very blendable (as shown below) and can also be blended with a moist beauty blender. Such a fantastic product.


--------------------------


Thats it for this weeks/last month's favs. I hope you enjoyed this post. 
I will start making more of these kinds of posts as well as little snippets of video tutorials or whatnot. 
P.s. The products can be purchased by clicking the name in the section where products were listed. 
Have a blessed day! - Sette V. &hearts; 

Out and About. #tbt